Northern Light Photography: Easy Beginner’s Guide
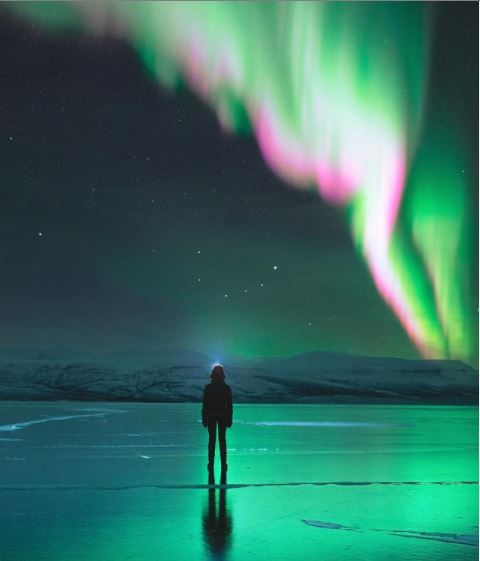
One of the highlights of our trip to Swedish Lapland was definitely seeing the majestic Aurora Borealis dancing in the night sky. Not only was the star-sprinkled night sky in its own right already worth staying up late for, but seeing the northern lights for the first time has something absolutely magical about it. Many hotels and tour operators offer northern light photography tours & aurora hunting trips. However, as we enjoy doing most activities at our own pace and enjoy the fun of “hunting” our own auroras, my Northern Light Photography Easy Beginner’s Guide below will help you get that photo and capturing the beautiful Northern Lights without spending hundreds of dollars on a tour.
First things first: I am not a professional photographer and took photos of the Northern Lights for the first time on our trip to Swedish Lapland in December 2020. I myself read many guides but found it difficult to find a beginner’s guide which brings the most important basics on point without over-complicating.
My goal with this guide is to help you prepare and plan for your Aurora-hunting adventure to make sure you have a wonderful time outside and have some great photos to cherish after your trip. This guide will provide an overview of things to plan and how to prepare, give you an overview of photography equipment needed and what settings to use as well as some tips for composition.
Preparation & Planning for Northern Light Photography
1. Wear warm clothing
As the northern lights are best visible above the Arctic Circle and in the winter (usually between 9 PM – 4 AM), chances are it is going to be cold outside while you are taking pictures.
There is nothing that can spoil the experience more (and this goes for any activity you are planning to do in Lapland), than being cold after a few minutes. The Aurora Borealis is a little unpredictable in its brightness and movement, therefore it can take a while until you get that perfect shot on camera, so make sure you are dressed warm enough to be able to “sit it out” while having fun & not freezing.
This means 1-2 layers of wool socks, warm winter boots, long johns, and thermal underwear as well as warm winter pants, a fleece or wool sweater, warm winter jacket and scarf. Of course a hat and gloves are very important too (ideally with separated fingers, for easier camera handling).
2. If possible, drive your own car for maximum flexibility
This might sound logical, however, what we found on our aurora hunting nights: the clouds in Sweden move quickly and you need to have a cloudless sky to see the aurora and be able to photograph it. That being said, sometimes it makes all the difference just driving a few kilometers further down the road to get that perfect spot.
But how to know where to drive to get the best chance of seeing the aurora? See point #3.
3. Three Apps that will help your Northern Light photography adventure
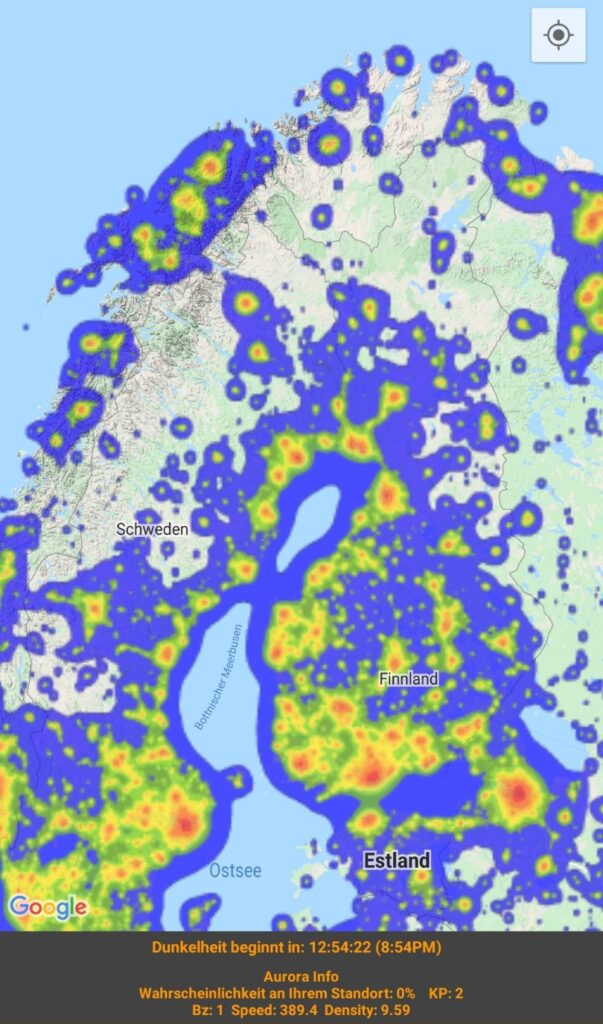
The first app you will want to get is an “Aurora borealis forecast” app. I used this free one. This will give you some useful info such as the KP-value (i.e. how strong the solar winds are. The higher this value, the stronger the aurora & the further south it will be seen), percentage likelihood of seeing the aurora in your current location (the higher the better, of course) & how the aurora is predicted to develop over the next hour.
Weather app with a cloud movement tracker, showing the expected movement of the clouds in the next hours. This will give you a good indication of where there might be some spots without clouds, so you know in which direction to drive.
Light Pollution Map app will give you an overview of where the sky is dark enough so that your chances of seeing aurora activity are as high as possible. The lower the value of the bortle, the less light pollution in your area (e.g. 1 = 1 excellent dark sky, 3 = rural dark sky, 8 = city sky). If you live in a big city like me, any bortle value below 4 will probably already be darker than what you see every day. A value below 4 is ideal for getting the most out of your pictures.
For more info on dark skies and bortle, check out this link https://www.handprint.com/ASTRO/bortle.html.
4. Bring a headlamp
A headlamp is very useful when photographing the aurora: you have both hands free (e.g. for tweaking settings on your camera), it lights your path while walking to your aurora-watching spot and you can do cool light-painting effects while you are waiting for the aurora to become more active.
I use this headlamp here. I love it because it charges with USB (no batteries you need to carry), has both while light and red light settings, and various ways you can adjust the strength and frequency of the light.
Northern Light Photography Equipment
5. Bring enough spare batteries
In cold temperatures batteries often tend to discharge quickly, so make sure you have at least 1-2 spare batteries with you to last you while you are waiting for the aurora to unfold. Ideally, keep them in a warm place such as your inner coat pocket.
6. Get a fast-writing & cold-resistant memory card
As you will be taking photos with a long aperture, the amount of image information is quite complex and takes some time to process, so make sure you have a fast-writing memory card to make your photography experience more enjoyable and ensure the best image quality. I used a SanDisk Ultra 32GB with 98 MB/s (Class 10, U1) card which works in temperatures up to -25 degrees Celcius (-13 F).
7. Very important: Use a tripod
In aurora photography, you will work only with long exposures, so using a tripod to make sure your pictures are sharp is absolutely necessary! If you don’t have a tripod, many hotels will have one you can borrow, or you can try putting your camera on a hard, flat surface (wall, bench, etc.) but you will be less flexible in designing your picture composition.
I got really good results with this one here. This tripod is super easy to handle, set up and allows for you to be super flexible on how to angle your camera.
8. Camera with Manual Mode
Make sure your camera supports manual mode. The best choice is a DSLR with a full-frame sensor or a mirrorless digital camera with APS-C sensor such as a Sony Alpha6000.
9. Lens Type: F-stop (f/4 or below) & focal length
Try using a lens with a focal length of 32mm and below. The focal length determines how much of the landscape (and more importantly of the sky & northern lights) you will get in your picture. This will often get you into the world of ultrawide angle lenses (focal lengths usually between 10-25mm).
If you don’t have one of these at this point, don’t worry. A lens covering a wide range of lengths (such as 18-70mm) will give you great results as well.
I took most of my pictures with this lens here.
A second important part to note when looking at the lens is the f-stop. Before getting into the nitty-gritty of what settings to use on your camera, it is important to understand the relationship between Aperture, Shutter Speed, and Light sensitivity (ISO). As you will be playing around with these settings a lot while taking aurora pictures, it is important to understand what each of these does for your picture.
The Exposure Triangle of Photography gives a nice overview:

The f-stop/aperture value tells how much light is being let into your camera through the lens opening. The lower the number, the more light is being let in. In Aurora photography, you want to let in as much light as possible to capture the colors and movements of the lights. I found that a value below f/4 works best (ideally f/2 or f/2.8).
The ISO value on your camera, tells how sensitive your sensor is to light. The higher the ISO value, the more light is being processed by your sensor. Especially in poor lighting conditions the ISO value helps the camera “see” more detail. The downside of a high ISO, however, is that it also increases noise in your image. Therefore, try shooting with the lowest ISO value possible. I found that a value below 800 works well. (The bigger your aperture, e.g. f/1.8, the lower an ISO value you will need, as your camera is already letting in a lot of light).
The last value is Shutter speed. This value defines how long you are exposing your picture to light i.e. how long you are allowing the lens opening to stay open. The longer you keep your shutter pressed the lighter your picture will be, e.g. the more of the aurora and its movement you capture. For most of my pictures, my shutter speed was between 10-20 seconds (10″ – 20″).
A quick tip: if you leave your shutter speed longer than 20-25 seconds, you will get star movement. This means the stars in the picture will no longer be dots but lines, which I personally don’t like as much.
As you can see, all three settings are interdependent and you will have to play around a little to see for yourself what combination works best for you. Keep in mind: increasing your ISO degrades your image quality. Shutter speed & aperture don’t. So make sure you play with these settings first before increasing your ISO.
Northern Light Photography Camera Settings
10. Nine Camera settings for Northern Light Photography
Now that we have the right equipment down, it is important to use the right settings on your camera to get that aurora picture.
- You will want to switch your camera into manual mode, to really be able to tweak each of the settings indvidually.
- Switch off your image stabilization in your camera, as this might work against your tripod, which is already stabilizing your images.
- Focus the camera lens near the infinity point (∞) which is marked on most lenses. To get the image nice and sharp, play around until the image is sharp at the horizon. You can also do this during daytime as a preparation step, which may be easier than doing this in the dark.
- Use White balance setting “Incandescence”. Alternatively you can also shoot in K (Kelvin) Mode. Values of 2800 – 4000 work well for Northern Light and Night photography.
- Set Metering mode to Center Weighted Average.
- ISO setting as low as possible to descrease noise, but high enough to have a sensitive sensor. Start at 800 (try staying in the 400-1600 range).
- Aperture as low as the lens allows for, to let in as much light as possible (e.g. between f/1.8 to maximum f/4).
- Set shutter speed to about 15 seconds for starters. This will get you a good amount of long exposure, while not getting too much star movement. You can experiment later to see what value gives you the best effects. (The faster the Aurora moves, the shorter you will need to expose, otherwise you will just get a blob of color in your picture. In turn, for a slower Aurora, keep the shutter open longer. Keep this setting flexible as the light changes over the course of the evening/night.)
- Last but not least: Use self-timer (e.g. 2 sec) or remote shutter (e.g. mobile app coupled to your camera or an external shutter). Even the slightest shake of the camera will make your picture blurry, so make sure you keep your camera still when pressing shutter.

Composition Tips for your Aurora photos
Now, in theory, you are ready to take your aurora picture! On an end note, I wanted to leave you with some last tips on how to get the composition right and make your images more visually appealing.
11. Inspiration & Tips for Photo Composition
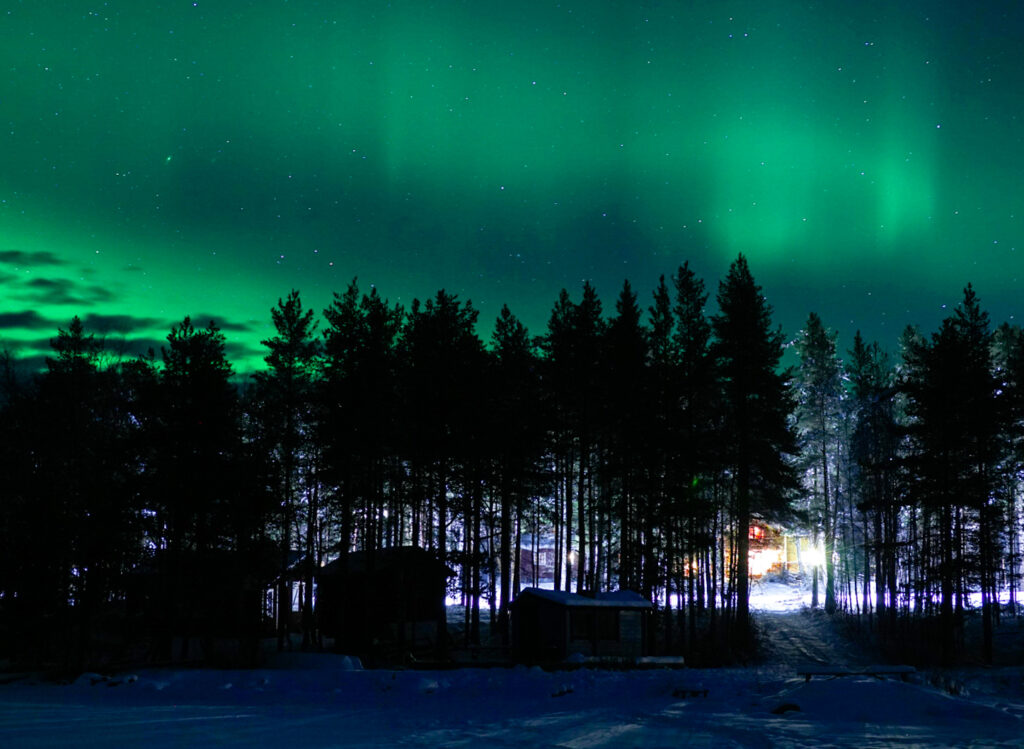
If somehow possible, try to get a building/house or anything with lights on included in your picture. It makes your image more interesting, cozy and gives a nice contrast to the dark sky & aurora. Also, this will help you when manually focussing your picture, to make sure it’s sharp. Most pictures you will find on Instagram etc. will have some form of cute wooden cabin lit up brightly in the snow, with a gorgeous aurora in the sky overhead.
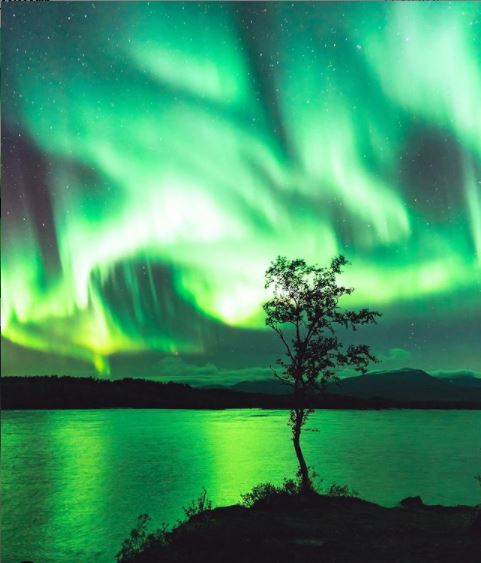
Trees, mountains, and lakes in the picture work really well too. If you are near a lake, this will reflect the light of the aurora and give your picture a special touch. Dramatic mountains or trees in the foreground work well too and make your image more interesting.
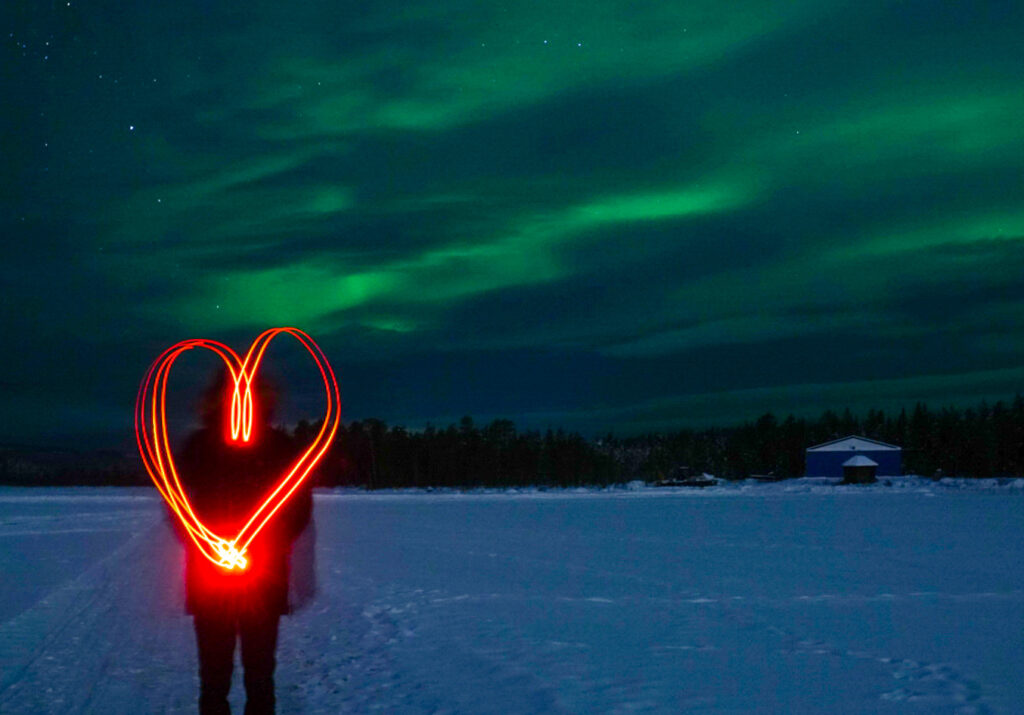
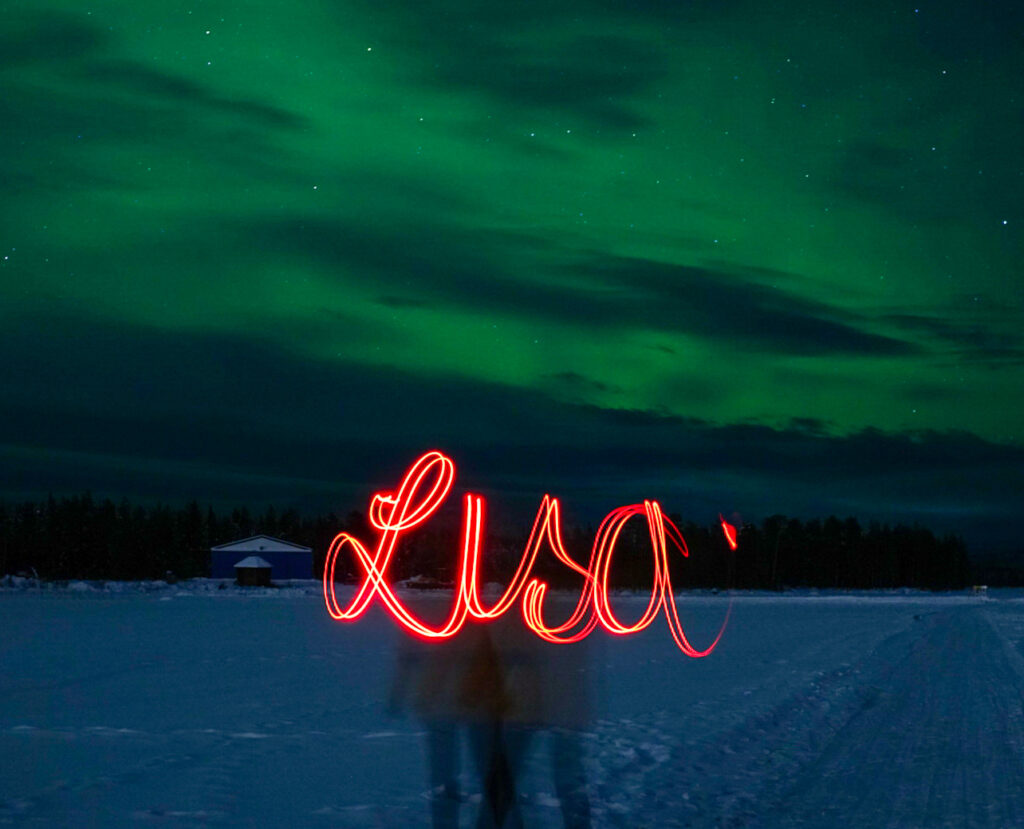
Another thing you can play around is with light painting. Get in position and take off your headlamp. Now draw something in the air with your lamp (e.g. write your name or a heart), while the picture is being taken. With the long exposure, it will show up in the picture.
Last Notes & Disclaimers
That’s it! You are now all set to take beautiful images of the aurora. Wear your warmest clothes, find a nice, dark spot & let your creativity flow!
Keep in mind: practice makes perfect, so the more often you go out for images, the better your results will be.
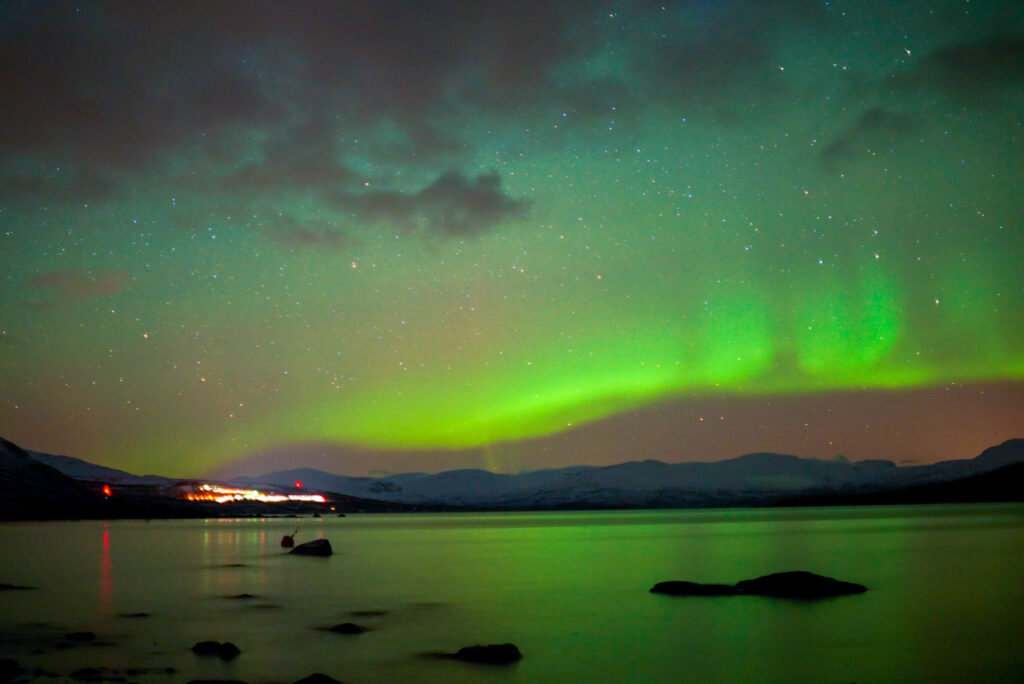
Also, when “aurora hunting” there is always an element of luck involved. Many factors such as KP-value and weather are going to determine whether you will see northern lights. However, what we also experienced was that even if our app said low activity” (e.g. KP-1,67) or low percentage chance of seeing the aurora (e.g. 15%), it was worth taking a quick peek outside. A few nights we had beautiful displays, despite imperfect conditions.
I hope this article was helpful for you! As I myself am not a professional photographer, this guide is more for beginners or hobby photographers. So if you have any more tips or advice, please feel free to share & leave a comment below!
What’s next?
To read more about our wonderful trip to Swedish Lapland, check out this blog post (coming soon).
If you are not sure what to pack for a holiday above the Arctic Circle, don’t worry – I’ve got you covered in this post (coming soon).
For more wanderlust or inspiration, check out the homepage for other posts or my destinations page.


You May Also Like

The Ultimate 3-week Namibia Road Trip Itinerary
Visiting Sossusvlei & Deadvlei in Namibia: the Ultimate Travel Guide